
Furnace Lighting and Light Bulb Parts: Visibility for Maintenance
What furnace lighting and light bulb parts do, and why they matter
Every safe and thorough furnace inspection starts with seeing what you are doing. Built-in furnace lighting and light bulb parts illuminate the burner compartment, the control area, and the blower section so you can read part labels, verify wire connections, inspect gaskets, and confirm flame quality without juggling a flashlight. On many residential gas furnaces, the lighting is a simple low-wattage lamp in the service bay. Some older units rely on a socket-and-bulb setup mounted near the burner window. Commercial air handlers may use panel lighting strips along the chassis. While these are not high-tech components, they directly affect safety and furnace lighting light bulb parts speed. A burnt-out light bulb invites mistakes, especially when you are trying to read a circuit board timer code or verify a furnace fuse rating in a dark basement.
OEM furnace lighting assemblies and related HVAC parts are built to tolerate vibration, heat, and occasional dust exposure. Using the right bulb and socket prevents arcing, cracked glass, and nuisance failures. It also protects adjacent parts, from furnace insulation parts to furnace wiring harnesses, from unintended heat or contact. In short, reliable lighting keeps both your eyes and your equipment safer during maintenance or repair.
Furnace lighting parts in context: where they sit and what they touch
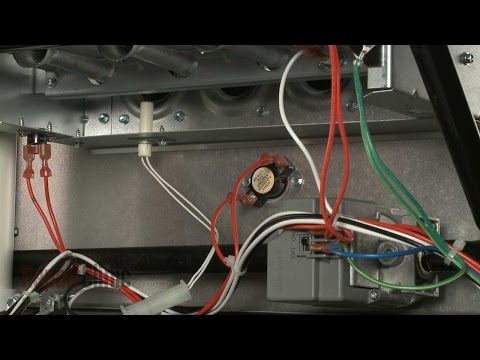
Pop the blower door on a typical 90 percent gas furnace and you may see a small service light tucked just inside the furnace panel opening. That lamp helps you work around the furnace blower wheel fan blade parts, motor leads, and the control board without shadows. In the burner vestibule, lighting is especially helpful for inspecting the gas burner and control valve area, watching the igniter glow, and confirming flame sensor contact. For electric models, lighting assists with visual checks of furnace heating element parts, thermal fuse brackets, and the high-limit switch. If you service oil furnaces, having reliable light near the burner chassis simplifies checking nozzle alignment and gasket seating.
For techs and skilled homeowners, adequate lighting speeds up routine tasks. A clear view of furnace filter parts means less chance of bending rails or misplacing a cap lid cover. Working near furnace duct venting parts is cleaner when you can see dust accumulation and insulation gaps. Inside the wiring compartment, you will find furnace circuit board timer parts and sometimes separate ignition controls. Reading tiny silk-screened labels on a control board or differentiating between a capacitor and a relay is far easier with a proper service lamp than with a phone light balanced on the heat exchanger.
Furnace lighting also helps you catch small problems that would be missed in the dark: a loose fastener, a fatigued bracket flange, a frayed control cable, or a weeping hose tube fitting. I have seen cracked gasket seal edges that only revealed themselves when the light hit at the right angle, preventing a future combustion leak. Good lighting is not glamorous, but it pays for itself in avoided callbacks and cleaner repairs.
Common maintenance and troubleshooting that benefit from good lighting
Many furnace troubleshooting steps depend on visual cues. A homeowner calls about a furnace not heating, and the first check is often the status LED on the board. If that LED sits behind a wire bundle, a working service light keeps you from misreading flash codes. When a furnace won’t stay lit, you furnace axle roller shaft wheel parts want to confirm the flame pattern at the burner and check that the flame sensor is actually sitting in the flame. If the blower is noisy, you will look for dust rings on the blower wheel, misaligned bearings, or a loose set screw on the motor shaft. Dim or absent lighting increases the chance that these details go unnoticed.
Service lighting also helps with the small but important jobs, like confirming that the blower door safety switch is aligned with the furnace door parts, or verifying the correct orientation of a replacement furnace filter. When you replace a furnace capacitor, reading microfarad and voltage ratings requires clear light. Checking the orientation of a furnace fuse or thermal fuse on an electric furnace demands the same. Even swapping a simple furnace knob or latch goes quicker when you can see how the latch spring seats against the panel edge. If you are cleaning, the light reveals where to focus cleaner deodorizer in dusty corners without overspray onto the control board.
Choosing the right furnace lighting and light bulb parts
Manufacturers specify bulb types for a reason. Heat exposure, vibration, and duty cycle differ from typical ceiling fixtures. Use the bulb type the furnace manual calls for, and match voltage, base type, and wattage. LED replacements can work, but verify that the LED is rated for elevated temperatures and won’t flicker under vibration. Some LEDs have metallic heat sinks that contact chassis parts if installed in tight compartments, which can cause buzzing or premature failure. Incandescent service bulbs remain common because they are inexpensive and tolerant of heat, though they do not last as long as quality LEDs.
Inspect sockets for heat discoloration and brittleness. If the socket is chalky or the contacts are pitted, replace the socket along with the bulb. Pay attention to routing of the lighting wires so they do not rub the blower housing or impinge on the furnace hinge area. If your unit uses a dedicated service light switch mounted behind the grille, clean and retighten it. Label the circuit on the board if it is not obvious. And if your furnace has no built-in light, consider adding a magnetic, low-profile LED service light on the chassis. Just keep it away from moving blower parts and hot burner surfaces, and remove it before closing the door.
Working safely around lighting to access key furnace parts
De-energize the unit before you reach into the cabinet. The service light circuit often shares the same line feed as the control board and igniter. Pull the disconnect or turn off the breaker, then verify the light is off. If your furnace uses a separate breaker for an outlet or service light, confirm both are de-energized. When replacing bulbs, use a clean, dry hand, and do not force a stuck bulb. A broken bulb base inside a socket can slice fingers or short the socket. If you encounter corrosion, a tiny dab of dielectric grease on the new bulb threads helps future removal, but keep it minimal to avoid contact issues.
Once the light is working, use the visibility to inspect nearby assemblies. Look for hairline cracks in furnace gasket seal parts around the blower panel, check furnace duct venting parts for rust or loose fasteners, and verify the blower wheel set screw is seated on the flat of the motor shaft. Sight along the furnace gas burner control valve manifold for even flame and check the igniter alignment relative to the flame. With an electric furnace, examine furnace heating element parts for hotspots or sagging coils. Good light makes these checks straightforward and fast.
Lighting helps you read boards, timers, and small labels when they matter most
Control compartments are cramped, and that is exactly where you need to read small print on furnace circuit board timer parts, ignition controls, and wiring diagrams. A steady service light lets you follow color-coded wires and verify terminal labels without moving your flashlight every thirty seconds. If you are diagnosing a furnace short cycling complaint, you can watch the LED flash codes in real time, confirm thermostat call status, and see the pressure switch tubing for kinks. It also helps you see that the door interlock switch is fully depressed when the panel is closed, a common miss after service that leads to a furnace not turning on.
Many newer boards include conformal coating and small surface-mount components. Misreading markings can lead to swapping a good furnace door parts board for a bad one, or vice versa. Proper lighting reduces those errors. If you have ever tried to read an 8-point font wiring diagram sticker while kneeling on a concrete floor, you know what this is worth.
When lighting reveals deeper issues: practical examples from the field
I once arrived on a call for a furnace making noise only on high heat. With the service light working, the shiny burr on a blower wheel rib caught my eye. That burr rubbed the housing intermittently. A few minutes with a fine file and the noise was gone. On another visit, a faint hairline crack in the inducer gasket was only visible at an angle with steady light. The crack explained a weak pressure switch reading. A new gasket seal and the furnace was stable again. These are routine saves made possible by being able to see clearly.
In electric furnaces, I have found overheated terminal blocks where the plastic tint changed from beige to brown. It looks obvious under a bright light, but not under a phone flashlight. That color shift is an early warning sign, long before an open connection trips a thermal fuse. Small visual cues like these are why I check the service light before I pick up a meter.
Quick lighting-centered checklist for a routine service visit
- Verify the furnace lighting light bulb parts operate before starting work, replace if dim, flickering, or failed.
- Inspect lighting socket and wiring for heat damage, clean dust from the lens or shield if present.
- Use the light to read board LEDs, wiring labels, and part numbers; photograph labels for later reference.
- With lighting on, scan for loose fasteners, worn gaskets, wire chafe, and dust buildup around the blower and burner.
Related parts you will see under good light
Service lighting is the gateway to addressing the usual wear items. In the blower compartment, you may replace furnace motor parts, furnace capacitor parts, or the furnace blower wheel fan blade parts if vibration or squeal points to bearing wear. Near the burner, you might swap furnace igniter parts or clean the flame sensor. Fuse and breaker checks are faster with clear visibility of furnace fuse, thermal fuse, and breaker parts. The control bay may require a new furnace circuit board timer if relays stick or solder joints crack. Even small hardware like furnace fastener parts, bracket flange parts, and latch parts benefit from a good visual once-over. On the cabinet exterior, you might adjust furnace hinge parts, replace worn handle parts, or tidy up a warped panel that does not seat against the switch.
If a filter rack is bent or a panel is missing an insulation strip, you will spot it with the service light. Replacing worn furnace insulation parts and ensuring tight furnace panel parts improves static pressure and cuts noise. While lighting does not fix these items, it makes White Rodgers furnace parts finding them simple, which shortens repair time and improves outcomes.
Manuals and part identification under the light
Even experienced techs reference furnace manuals, care guides, and wiring diagrams. With clear lighting, you can match part numbers on the board or motor nameplate to the correct listing, avoiding guesswork. When you are cross-referencing a draft inducer rating or a specific igniter resistance range, reading the tiny print matters. If the sticker is worn, lighting makes the remaining characters legible enough to compare against the furnace manuals care guides literature parts. Photograph labels while the light is on, then retrieve exact furnace part numbers for accurate ordering. This reduces returns and ensures OEM furnace replacement parts arrive the first time.
Where to source lighting and adjacent furnace repair parts
Stick with reputable suppliers that stock both common and unusual HVAC parts. For lighting-specific needs, including bulbs and associated hardware, you can find furnace lighting and bulb parts here. If your maintenance uncovers board or timer issues, browse furnace circuit board and timer components. For airflow problems discovered under good light, shop blower wheels and fan blades. And whenever you need a general catalog of furnace parts by category, browse the Repair Clinic furnace parts list to locate OEM-compatible replacements.
FAQs: quick answers you can read under a service light
Clear, concise guidance for common questions when the unit is open and the light is on.
Why is my furnace not heating even though the blower runs?
The blower can run while the burners fail to light. Common causes include a faulty igniter, dirty flame sensor, closed gas valve, or a pressure switch not proving draft. Check for error codes on the control board. With good lighting, verify igniter glow, watch the burner light-off sequence, and inspect tubing to the pressure switch. If it is an electric furnace, inspect heating element limits furnace gas burner parts and thermal fuses.
How do I replace the service light bulb safely?
Turn off power at the switch or breaker so the service light goes dark. Let hot parts cool. Unscrew the bulb gently and inspect the socket for heat damage or corrosion. Install a bulb of the specified type and wattage, and restore power. If the socket looks brittle or the light flickers with minor vibration, replace the socket and check the wire terminations.
Where can I find furnace manuals and part numbers?
Look inside the blower door or burner vestibule for the model and serial tag. Use the service light to read clearly, then search the manufacturer’s site or a reputable parts catalog. Manuals often include wiring diagrams and approved part numbers. Photograph the label for accuracy before ordering.
What furnace parts most often need replacement during routine service?
Filters, igniters, flame sensors, capacitors, and fuses lead the list. Blower belts on older units, door switches, and worn gaskets are also common. Service lighting makes it easy to spot failing components, read ratings, and avoid misidentifying similar parts in tight spaces.
Why does my furnace short cycle?
Short cycling can stem from restricted airflow, an overheating heat exchanger tripping the limit, pressure switch issues, or a thermostat problem. Under proper lighting, confirm filter condition, blower speed settings, duct restrictions, and that the limit switch wiring is secure. Watch the board’s status light for diagnostic codes to narrow your focus.
Furnace Parts - reliable OEM solutions for clearer, safer maintenance
Good lighting is the quiet enabler of quality furnace work. A working service lamp lets you read control boards, check burners, evaluate blower components, and confirm labels without improvisation. That visibility reduces mistakes, speeds up diagnosis, and makes tight compartments less frustrating. When your service light fails, replace it with the correct furnace lighting light bulb parts, and use the opportunity to take a careful look around the cabinet. You will often spot small issues before they turn into big ones.
As you work under that steady light, trust OEM-grade furnace parts for replacements you can stand behind. Match igniters to the control strategy on your board, size capacitors to the motor nameplate, and pair fuses with the element ratings. Keep a short list of essentials on hand, from furnace fuse thermal fuse breaker parts to common blower wheels and bracket flange hardware. Reliable parts, paired with consistent visibility, are the simplest path to safe, repeatable heating performance all season long.