Furnace Lighting Upgrades: LED Indicator and Bulb Parts
Furnace lighting sounds trivial until you are crouched in front of a blower cabinet, trying to decode a two-flash error with a dim, flickering LED or a burned-out service light. Good visibility and reliable status indicators make diagnostics faster and safer. Upgrading furnace lighting light bulb parts, LED boards, and their supporting components often solves nuisance issues, prevents misreads during troubleshooting, and cuts maintenance time. Whether you manage a small rental portfolio or maintain your own system, understanding how these pieces tie into furnace circuit board timer parts, ignition controls, and safety circuits pays off.
Lighting touches more than one part of a heating system. LED indicators live on the control board or a daughter board, while service lamps mount on the chassis or door. Their operation can be affected by furnace fuse thermal fuse breaker parts, furnace capacitor parts that stabilize power, and even the condition of furnace door parts and latch parts that must close the safety switch. When lights go dim, blink erratically, or fail outright, you lose a vital window into what the furnace is doing. The right upgrade restores that window.
What furnace lighting parts are and why OEM replacements matter
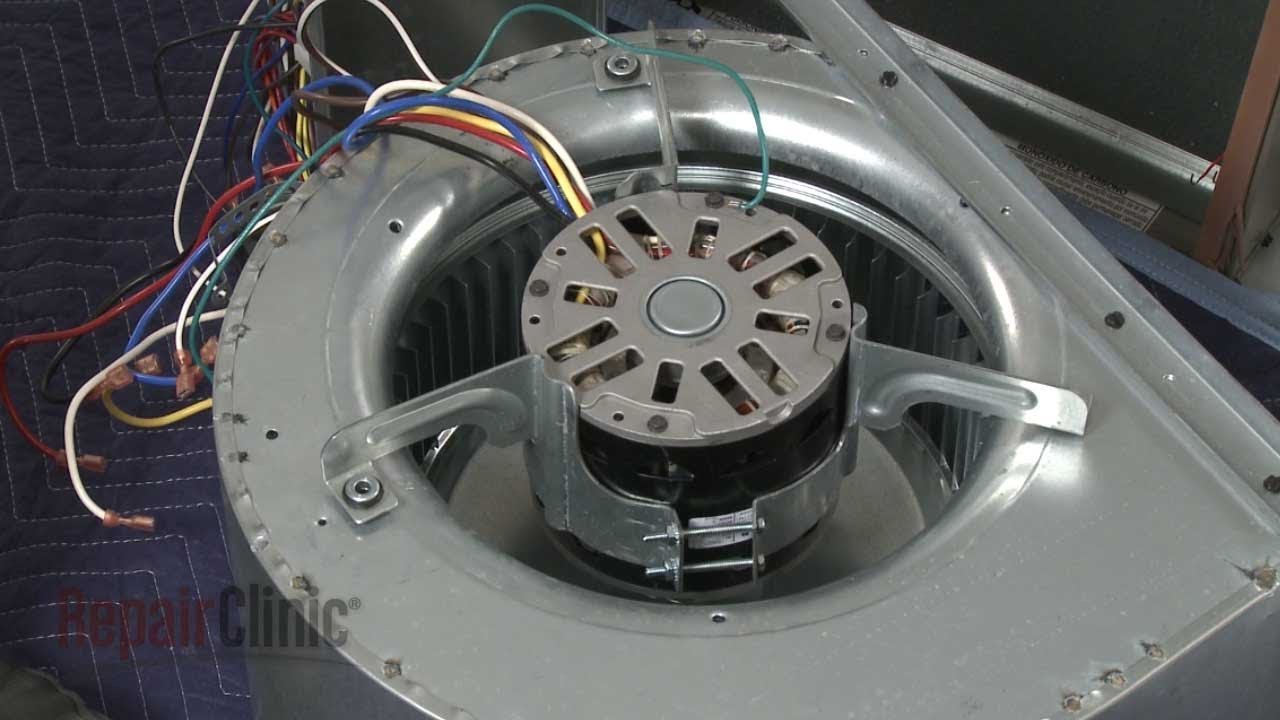
Furnace lighting light bulb parts include integrated LED status indicators on control boards, separate LED strip kits for the cabinet, and traditional bayonet or wedge-base bulbs used as service lights in some models. Many modern gas furnace parts consolidate indicator LEDs directly on furnace circuit board timer parts or ignition control modules. Older units may use a small incandescent bulb wired to a door switch to illuminate the blower compartment.
OEM replacements keep the electrical characteristics consistent with the board design. LED indicators are engineered for a specific forward voltage and current, and they rely on appropriately sized resistors and diodes on the board. Substituting a random LED or bulb can change current draw and heat, sometimes enough to cause nuisance trips or shortened board life. In my field experience, mismatched indicator parts have produced false flame-sense errors and ghost codes that disappear when the correct part is installed. For that reason, choose OEM or high-quality equivalents with matching specs, and verify fit with the furnace manuals care guides literature parts and the unit’s model tag.
Lighting parts in context: an overview of related furnace components
Lighting never operates in isolation. The cabinet service light, the LED triage indicators, and any auxiliary illumination work alongside the control logic, power conditioning, and safety circuits. If the control LED is dark but the blower runs, the issue could be a low-voltage fuse on the board, damage in furnace diode magnetron resistor parts on the control PCB, or an open door switch tied to furnace hinge parts or latch parts not fully closing.

The physical mounting matters as well. Furnace bracket flange parts secure LED modules or light housings, and furnace chassis parts and panel parts dictate where illumination can be placed so it does not interfere with airflow or wiring harnesses. When adding a cabinet LED, route wires with furnace control cable parts, protect penetrations with furnace gasket seal parts, and avoid contact with hot surfaces or moving hardware like furnace blower wheel fan blade parts or furnace motor parts. For anyone tempted to tape a light in place, use the right furnace adhesive parts and fastener parts that withstand vibration and heat, rather than household glue that releases in a warm cabinet.
Upgrades should respect airflow and codes. For example, furnace duct venting parts and grille kickplate parts must remain unobstructed. Keep added wiring away from furnace gas burner control valve parts and furnace igniter parts. A tidy install is not just aesthetic, it’s safer and easier to service later.
Common lighting issues, symptoms, and quick checks
Most lighting complaints fall into one of three categories: burned-out bulbs or dim LEDs, erratic or misreading status indicators, and lights tied to door switches that never come on. Dim cabinet lights tend to be straightforward, usually a failed bulb or LED strip. Erratic board LEDs are trickier. If power is unstable, the board LED can strobe or fade when the inducer or blower starts, often pointing to weak furnace capacitor parts or a marginal connection at a spade terminal. I look for loose furnace hose tube fitting parts near the pressure switch that might be shutting the board on and off, or a hairline crack in the board’s solder around the LED.
If a service light never comes on, inspect the door switch alignment. Worn furnace door parts, weak furnace latch parts, or bent furnace hinge parts can keep the switch from closing fully. I once replaced a switch twice before realizing the door had a bowed edge. A minor adjustment to the bracket flange parts and a new door gasket solved it permanently.
For incandescent cabinet lights, heat and vibration shorten life. LED retrofits reduce current draw and heat output, which is kinder to boards and nearby wiring. Always confirm the LED is rated for the ambient temperature of the blower compartment and install it clear of hot draft components or furnace heating element parts in electric units.
Practical upgrade paths for LED indicators and service bulbs
There are two common upgrade paths. First, replace faded or intermittent control board LEDs by installing a new OEM board or compatible furnace ignition controls parts that include a fresh LED. This is the cleanest route when the board already shows other age-related symptoms, like random resets or code memory glitches. Second, add a low-voltage cabinet LED light to replace an unreliable incandescent service lamp. Use a small 24-volt LED assembly, fused, drawing under 100 mA, and tie it to the door switch so it only illuminates when the panel opens.
If you retrofit, anchor the light with appropriate fastener parts into the chassis, not into insulated plenum walls. Run wire alongside existing harness channels using control cable parts, and protect edges with grommets. Where the original design leaves no mounting points, a small bracket fabricated from furnace bracket flange parts gives a secure and reversible solution. For serviceability, mount lights near the data label and control area so you can read part numbers and wiring diagrams.
If you need replacement items, you can find a broad catalog of OEM and universal options by starting with this Repair Clinic furnace parts list for a full range of heating system parts: replacement parts at Repair Clinic. For boards with integrated indicators and timing functions, browse furnace circuit board timer parts. If the cabinet lamps are failing, see click here for furnace lighting bulbs, and if power irregularities are dimming your LEDs, consider click here for furnace capacitors to restore steady voltage.
Power and protection: fuses, capacitors, and clean connections
Lighting quality often mirrors the health of the furnace’s power circuits. On many gas furnaces, a 3- or 5-amp blade fuse protects the low-voltage transformer and board. A partially oxidized fuse blade or holder will drop a few tenths of a volt at normal load, which is enough to make indicator LEDs dim during inducer start. Replacing the fuse with the correct type from furnace fuse thermal fuse breaker parts and cleaning the holder can stabilize the LED. The same goes for the door switch, which can develop high contact resistance. A switch that measures fine with no load may drop voltage under load, flickering the cabinet light.
Capacitors matter too. Weak run capacitors on the blower motor can cause line sag during start-up. You might notice the service light dimming noticeably when the blower ramps, a telltale of a capacitor past its prime. Pair a new blower run cap with inspection of furnace motor parts to prevent repeat issues. Keep wiring tidy with control cable parts and verify ground continuity on metal-chassis units, since poor grounding invites nuisance static and odd LED behavior.
When I tune a furnace that has had lighting complaints, I include a basic housekeeping pass. Wipe dust with cleaner deodorizer parts safe for electronics, tighten fastener parts on ground lugs and neutral bars, and check for chafed insulation near sharp panel edges. Be mindful of insulation batting and furnace insulation parts that can contact a hot lamp. Upgrading to LED strips with diffusers helps distribute light and reduce hot spots that can discolor paint or nearby panel parts.
Mechanical details that influence lighting reliability
Vibration is the enemy of small lamps and board-mounted LEDs. Unbalanced blower wheels shake the cabinet, wear out brackets, and crack solder joints. If your control board LED intermittently fails after a call for heat starts, inspect the blower wheel for dust clumps or bent fins. Furnace blower wheel fan blade parts should be clean and balanced. Bearing play in the motor will also transmit vibration, so check furnace bearing parts and, where applicable, furnace belt parts in belt-driven air handlers.
Cabinet fit is another factor. Doors that do not seat evenly can leave the service light circuit half-closed, especially on older units where the lamp switches on when the door opens. Freshen the closure with new latch parts, hinge parts, or handle parts as needed. If the door uses magnets or spring clips, renew worn components. A clean, firm-close door makes a surprising difference in preventing nuisance flicker.
The mounting surface for a retrofit light should be stable. Avoid thin or removable panel parts that flex when you press them. The furnace chassis parts near the control compartment are usually best. Where you must pass wires through a sharp opening, add a grommet and a dab of the correct adhesive to keep it seated. Using proper Intertherm furnace parts gasket seal parts at penetrations also keeps combustion air and cabinet air separated as designed.
When to suspect other systems: ignition, gas valve, and boards
Sometimes a “lighting” complaint turns out to be a symptom of a larger issue. If the status LED shows random error codes or no code at all while the furnace not heating condition persists, suspect the control board or ignition controls parts, not the LED itself. Flame-sense problems caused by a dirty burner, a compromised ground, or a failing gas valve can present as confusing blink sequences. It pays to verify low-voltage supply, check the ground path from the burner to the board, and confirm steady 24 volts through a heat call.
Erratic LEDs during inducer or igniter operation can indicate borderline line voltage or an overtaxed transformer. Check the transformer output both unloaded and during a call. If the LED dims severely when the igniter powers, evaluate the igniter current draw. Some hot surface igniters pull 3 to 5 amps momentarily, and a weak connection in furnace fastener parts or a tired breaker can sag voltage. If the board itself runs hot or shows discoloration around the LED, an OEM board from the circuit board timer parts catalog is the safest furnace not heating fix.
Installation notes and a short checklist
A reliable lighting upgrade comes down to five habits that prevent callbacks and protect the rest of the furnace. Keep this brief checklist on hand when you plan a cabinet LED or bulb replacement.
- Confirm the electrical rating, temperature rating, and voltage of the lamp or LED assembly against the furnace manuals care guides literature parts.
- Use proper mounting with bracket flange parts or fasteners into rigid chassis metal, not into thin removable panels.
- Route wiring with control cable parts, protect edges with grommets, and avoid hot surfaces, moving blower wheel fan blade parts, and ignition areas.
- Stabilize power first with healthy capacitor parts and the correct low-voltage fuse, then evaluate the LED behavior before declaring the board bad.
Brand considerations and parts sourcing
Though the lighting principles are similar across brands, details vary. Many Carrier, Trane, Lennox, Rheem, Goodman, and York furnace control valve parts models integrate LED diagnostics on the main control. Some place a sight window on the furnace door for reading codes without removing the panel. Others require the door off to see the LED, which makes a cabinet service light more valuable. Classic units from various manufacturers sometimes used incandescent bayonet bulbs for service illumination that run hot and fail frequently. These are prime candidates for LED strips with low current draw.
When replacing a board to restore a fading LED, be mindful of cross-compatibility. Even within a brand, the revision level and timing profiles matter. furnace repair guide Match the control to the exact model number. If you are unsure, the safest route is to search by full model and serial, verify the pinout and molex connectors, then order. For user-friendly browsing by category, see a curated selection of furnace lighting components and related items like capacitors and boards at the links shared above. The advantage of searching by specific part families, such as furnace lighting light bulb parts or furnace circuit board timer parts, is that you can narrow to OEM or compatible replacements without sifting through unrelated HVAC parts.
FAQs: quick answers on furnace lighting and indicators
Why is my furnace status LED dim or hard to read?
A dim LED usually points to low-voltage drop across the board, oxidation at the board fuse, or a failing board LED. Check the low-voltage fuse and holder, verify 24 volts at R and C during blower startup, and inspect ground continuity. If voltage is steady but the LED remains faint, the board’s LED circuit is likely deteriorating and the fix is a board replacement.
My cabinet service light keeps burning out. What should I replace it with?
Swap the incandescent for a low-current LED service light rated for the furnace’s ambient temperature. Tie it to the door switch so it only furnace duct venting parts lights when the panel opens, mount it on rigid chassis metal, and keep it away from hot draft components. The result is cooler operation and far longer life.
Can lighting issues cause furnace not heating symptoms?
Lighting rarely stops heat directly, but the conditions that dim or flicker LEDs often coincide with power or ground problems that do. A weak blower capacitor, a loose low-voltage connection, or an oxidized fuse holder can create both odd LED behavior and intermittent heating. Fix the electrical fundamentals first.
Where do I find manuals and part numbers for my indicator LEDs or bulbs?
Start with the model tag inside the cabinet, then use furnace manuals care guides literature parts to match part numbers. Many boards list their own part numbers near the diagnostic LED. If you prefer a guided search, find parts here with model-based filters and exploded diagrams.
Is it safe to add an LED strip inside the furnace cabinet?
Yes, if it is low voltage, properly fused, routed away from heat and moving parts, and mounted to rigid metal with approved brackets or fasteners. Avoid penetrating the combustion vestibule or disturbing duct venting parts. If in doubt, have a licensed tech review the install.
Furnace Parts – reliable OEM solutions for visible, safer service
Good lighting is the simplest upgrade that pays back every time you open the cabinet. A bright, steady service light and a crisp status LED help you read codes correctly, verify wiring colors, spot soot or rust early, and button things up with confidence. Treat dim or failing lights as a clue to check underlying power health, including fuses, capacitors, and grounds. Use sturdy mounting with proper bracket flange parts, route wiring cleanly with control cable parts, and select bulbs or LED assemblies rated for the environment. When a board LED itself is failing, opt for the correct OEM control so the furnace’s diagnostics remain accurate.
If you are sourcing parts, you can browse a comprehensive range of OEM and compatible lighting, boards, and power support items at these resources: Repair Clinic furnace parts list, shop parts for cabinet lighting, Carrier and Trane-friendly circuit boards, and furnace capacitors for steady power. Pair the right components with careful installation and your furnace will be brighter, safer, and simpler to service when the next cold front hits.